
An Introduction to Flower & Plant Photography
by Lindsay Dobson FSWPP FBIPP
I find plant and flower photography utterly absorbing, and incredibly relaxing. Nature is known to have that effect on the human mind and in my opinion there is no better way to escape life’s pressures. Despite being a portrait photographer, flower and plant photography is something I enjoy hugely for that very reason.
It’s easy to assume that this kind of photography is limited to the warmer months of the year, but that isn’t the case. Even in the depths of winter trees and woodlands can provide wonderful shapes and motifs. As spring starts to unfold, new growth and bright green buds herald blooms such as daffodils and crocuses. Next come the bluebells and then a colourful floral profusion from early to mid summer. The golden tones of autumn close the cycle which marks how special our seasons are in the UK.
Like many forms of photography, flower and plant photography can be frustrating at first. We may end up with photographs which appear to be messy, cluttered, or with distracting backgrounds. All of this can be minimised by learning a few useful techniques and following the tips I’ve shared below.
What time of day should I photograph plants?
We need to consider the best time of day for flower photography, and the kind of light which will enhance our subject. In the warmer months it’s well worth getting up early or stepping out in the early evening. At the beginning and end of the day the light is more golden and the sun is low in the sky, meaning we can backlight and rim light our subjects. Warm directional light is lovely for all kinds of nature photography.

Warm morning light ….
Golden light at the beginning or end of the day is a no-brainer for nature photography. It adds a sense of depth and dimension
Often our schedules mean we can’t choose the optimal time of day for a photo excursion. In that case a slightly overcast day will always be a safe choice. The light will be soft and even and we won’t need to worry about harsh shadows or glare. This kind of light is ideal for flower photography, even at midday when the direction of light is overhead.
If the sun is bright and glaring, it’s not the end of the world. Often it’s possible to hold a sheet of paper in between the sun and the flower to diffuse or block the light, or even a mini fold up ‘scrim’ which will fit easily into a small camera bag or even a large handbag.
Not having enough light is more problematic than having the wrong light. Dim light means we may not be able to handhold our camera without seeing some camera shake in the photo, due to slow shutter speeds. Opening up our aperture as far as possible can help to mitigate a slow shutter, but means shallower depth of field – something we may not want. If we can’t open our aperture any further we may need to increase our ISO sensitivity beyond the point where we’re comfortable. In this situation a tripod is likely to be the only option - we can then choose whichever aperture we desire without worrying about how slow the shutter speed will be.
We don’t need to photograph plants and flowers outdoors. We might have potted plants which make excellent subjects, or even a bouquet of freshly cut flowers. Positioning the blooms close to a window, away from harsh sunlight, would be my first choice for soft light. Nothing beats natural light for plant and flower photography. But additive light isn’t always a bad thing - this can be as simple as bouncing the light from a small flashgun against a white ceiling or nearby white wall - this will give the effect of natural sunlight. Alternatively an inexpensive LED panel with a diffuser or sheet of paper across the front can give the effect of a soft box if placed close to your subject. There are always ways in which we can get pleasingly lit photographs of small objects such as flowers and flower details. The key is to experiment to find what works for you and the kind of photography you prefer.
Fog and mist can add an ethereal feel to nature photography - flowers can look absolutely fantastic on a misty morning. You will need to get out early though, because mist can burn off very quickly in the warmer months.
If your equipment is weather sealed, then a rainy day can add a fantastic layer of interest to flower portraits, particularly close-up images where water droplets can reflect the environment around them.
Which plants and flowers should I photograph?
The answer is - anything you like! From fields of wildflowers through to close-up studies of stamens and insects. With so many choices, flower photography gives us free rein to explore our creativity and to experiment with subjects which are many and varied. You may find that you love creating close-up and macro photographs. Or you may discover that you prefer photographing entire gardens as a landscape. Portraits of individual flowers, or groups of flowers, lie somewhere in between. When I photograph a formal garden I capture sweeping vistas showing the design of the garden, then I’ll take portraits of individual flowers and groups of flowers. Lastly I’ll take some close-ups of details and (if I’m lucky) some insects. Tip: insects are less active at the very start and close of the day.

An infinite spectrum of subjects ….
There’s little prospect of running out of subjects, where plant and garden photography is concerned. From wildflowers on our favourite walk, to our own garden specimens.
Whichever plants and flowers you decide to photograph, the first thing we need to do is decide on what we want to achieve. We also need to consider the angle at which a particular plant will look its best. Not every plant looks good from the front, and some are quite featureless from the side. Always begin by studying your subjects and thinking of ways to highlight their best features. Move around your subject and look at how the light changes as you change your point of view and angle. Think about getting down low to elevate your subject - this makes them look more imposing and can also be a good way of getting background intrusions out of the frame.
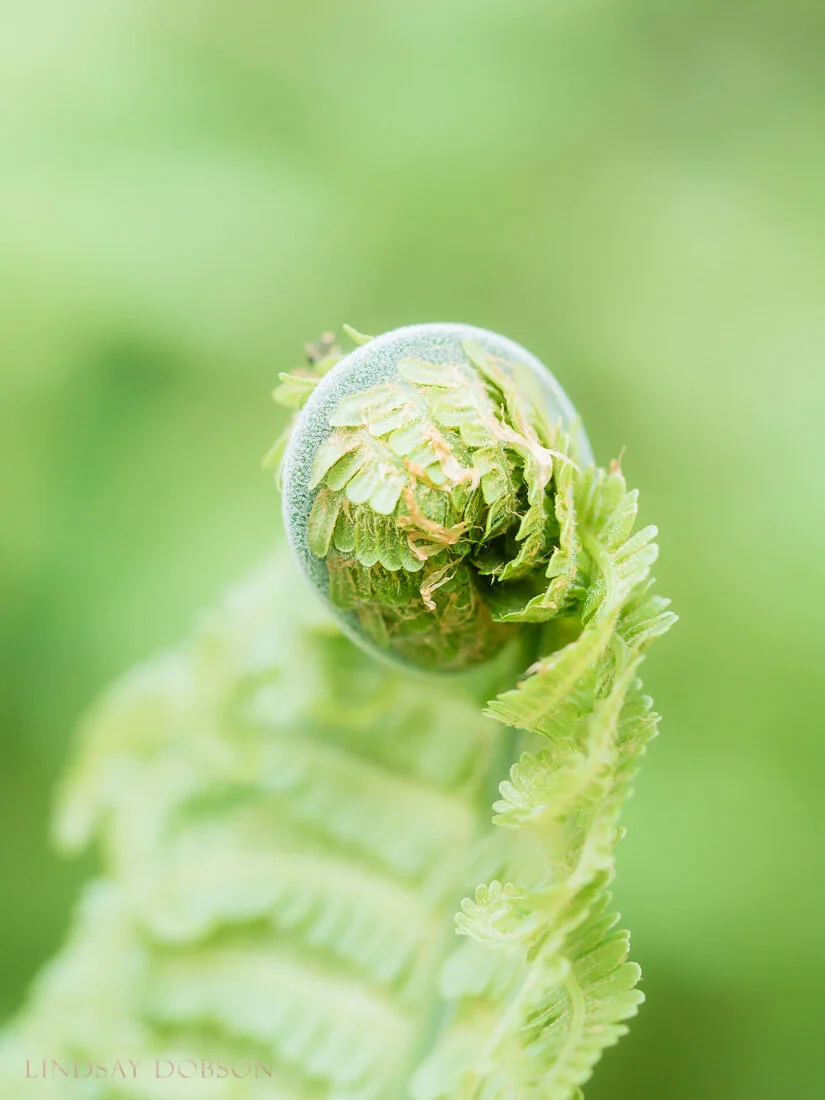
Isolating an individual ….
A young fern frond on a walk in local woodland caught my attention. The tiny frond leaves almost look like scales, creating repeating layers as the plant slowly unfurls over the coming days. A fresh green background creates a cohesive look.
What kind of equipment will I need to photograph flowers and plants?
The great thing about flower photography is that we can do it with pretty much any equipment. If we want to take extreme close-up photos then we will of course need an appropriate lens, but that doesn’t need to be expensive. In fact I’ve written an article on this very subject: Close-up Photography of Flowers and Plants
Very often when we buy a camera it will be accompanied by a ‘kit lens’. This is normally a zoom lens covering the slightly wide to slightly telephoto focal length - usually in the range of 24 to 70 mm in 35mm terms. Or we might favour a ‘super zoom’ lens which covers a wider focal range (such as 28 to 200 mm). We might even own the kind of telephoto lens suitable for wildlife photography, which covers an even greater range. Then there are macro lenses, which are prime lenses covering anything from 50 mm to 200 mm. All of these lens options are great for flower and plant photography, although with different features and benefits.
Standard Zoom Lenses for Garden and Flower Photography
A slightly wide to slightly telephoto zoom lens (the ‘kit lens’ I mentioned a moment ago) is a good starting point. Many kit lenses have quite good close focusing capabilities (although not close to true macro level). They tend to have variable apertures however, so they’re not always ideal if you want ultra-shallow depth of field. Standard zooms and slightly wide to tele ‘super zooms’ are ideal for general garden photography and I frequently use one if I’m visiting a formal garden (I’ll carry a close-up filter as well if I want to grab some macro shots).
Super Zoom Lenses for Flower & Plant Photography
A ‘super zoom’ lens can be even more useful than a standard zoom lens (although it may not be as good optically, so choose wisely). This is simply a zoom lens with additional range over and above a standard zoom.
Zooming tightly into our subject using a long focal length is a great way of minimising a cluttered or busy background. This is because longer focal lengths exhibit a phenomenon called ‘compression’, where the background appears to be squeezed together and brought further forward (the direct opposite to the effect created by a wide-angle lens). The longer the focal length, the more compression we’ll see. This can make the background appear smoothly even and ‘creamy’.
Over the years some of my favourite slightly wide to telephoto zoom lenses have included the Panasonic 14-140 (this is a Micro 4/3 lens, so it will give me a focal range equivalent to 28 to 280 mm in full frame terms). The Sony e-mount 18-135 is another favourite – it’s one of the sharpest lenses I own. On my APS-C Sony cameras this lens will give me an effective focal range of 27 to 202mm.
Then there are the ultra-zoom lenses which I normally use for wildlife photography. My favourite is the Panasonic Leica 100-400. This is a Micro 4/3 lens therefore the focal range will be equivalent to 200 to 800 mm. An extreme zoom such as this is fascinating to use for floral studies. Not only is the depth of field shallow at such high magnifications, the compression at focal lengths like this has an amazing effect on the background.
Tip: Another way of isolating your subject and helping it to stand out, is to make sure there is plenty of space between the flower and any other objects which are behind it.

Creating subject separation ….
Making sure there’s enough distance between your subject and the background helps to create a sense of separation. Choosing a longer than ‘normal’ focal length makes this much easier.
Focal Length in Perspective
The effect different focal lengths will have on the same subject can be quite glaring. I’ve framed the daffodil in a similar way in each image – look at how the background changes as the focal length increases.
For the pictures taken at 15 mm and 45 mm I’ve used my little Fuji XT 200 and its kit lens. The longer focal lengths were taken on the Panasonic GX8.
These photographs haven’t been cropped in any way (you’ll see a slightly different aspect ratio between APS-C and 4/3 format). The photographs were all taken at an aperture of F5.6. The slightly larger APS-C sensor on the Fuji XT200 will offer slightly shallower DOF at any given aperture, but that won’t affect the result of these images – which is to demonstrate the ‘compression’ effect inherent to longer focal lengths.
The point of this exercise is clear - if you have a messy or cluttered background then choose a longer focal length which will greatly minimise any distractions behind your subject. This can help to give a much smoother backdrop which places emphasis firmly on the flower. I do this in my portrait sessions when I’m working in domestic gardens with busy backgrounds. You’ll need sufficient space to stand back to accommodate the longer focal length. Below you can see the transition from 15mm, 45mm, 100mm to 236mm.


For this reason a good quality super zoom lens can be a real asset for garden and plant photography. When you want detailed close-ups one of the ‘diopters’ I’ve talked about below completes all possibilities in a lightweight and portable form.
Using a Dedicated Macro Lens for Flower Photography
A macro lens is the ultimate single lens option for close-up photography. A macro lens might have a focal length of anything from 50 mm up to around 200 mm. The longer focal lengths mean you’ll have more distance between the camera and your subject - this is preferable when shooting subjects such as insects who might be frightened away if we get too close. The amount of magnification will also differ.
If you don’t want to invest in a macro lens, there are other options. The most practical choice would be a close-up filter, which is a magnifier we can clip or screw to the front of our chosen lens. I always have one of these in my camera bag, they are so handy and they’re a lot of fun too.
And if you don’t have a camera then why not use your phone? Some phones can accommodate lens accessories broadening your choices for close-up photography and even shallow depth of field effects.

The value of a macro lens ….
I used a 60mm macro lens (on a micro four thirds camera) to capture this insect portrait. The diffused colours in the background complement the colour of the insect’s eyes. Had I been travelling light that day, I could just as easily have used a close-up diopter.
My macro lens is the Olympus 60 mm F2.8. This is a Micro 4/3 lens therefore it gives me an equivalent focal length of 120 mm (in 35mm/FX terms). This lens gives me a good amount of working distance should I need it, and also extremely close focusing capability. It’s also a terrific portrait lens. As this is a telephoto macro lens, I’ll also get a small amount of background squeezing for a smoother less cluttered result.
Close Up Filters for Macro and Flower Photography
I won’t go into too much detail about these very useful little snap-on or screw-on magnifiers, because I’ve already written an entire article about them. But I think everyone should have one of these in their camera bag. You simply place them on the front of whichever lens you happen to use the most - that includes any of the lenses or lens types mentioned above.
Composition
When photographing plants and flowers I think it’s important to avoid ‘mug shots’. Instead, think about how we can enhance the flower in a way which makes the photograph interesting. Key to this is the use of background. For example, a very clean and smooth background will make the subject the star of the image. Or perhaps we can frame the image so the colour of our subject is in direct contrast to the colour of the background. Colour can be used in other ways, I like creating shots where there are a mixture of coloured flowers. The background needs to either be similarly multi-coloured, or fairly plain for this to work.

Backgrounds in composition ….
Backgrounds are everything in flower photography. Creating diffused pools of complementary or contrasting colour can add impact to the main subject.
Or, we might use a background vista to add context - this might give the viewer information about where the flower was, particularly in relation to the other elements in the scene.
The use of differential focus is another useful technique - this simply means picking out one particular subject in a group and using shallow depth of field to isolate it.

Background context ….
Sometimes stepping back and including a little more background can add context to a plant portrait. These ferns live on the banks of a small lake.